If you are keen to explore your options beyond the traditional bouquet and don’t mind getting down and dirty with some serious DIY then our paper magnolia is the perfect project for you. Especially if you happen to be a hay fever sufferer planning a springtime wedding.
WHAT YOU WILL NEED
Green floral tape
Floral stem wire
Scissors
Doublette crepe paper
Watercolour paints
Paint brush
Water
1. First task is making the stem. We twisted three strips of floral stem wire together and bound them with green floral tape. If you want a thicker stem, simply add more floral wire.
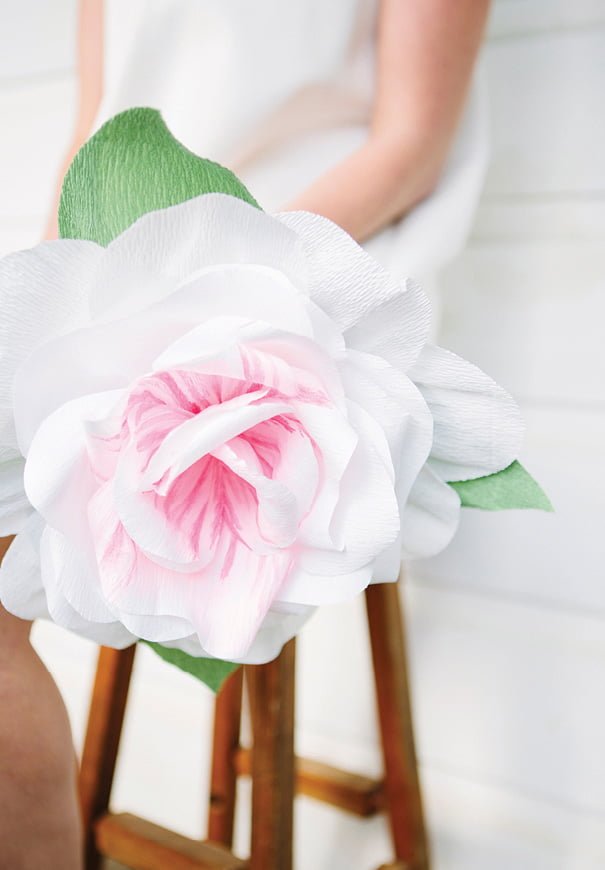
2. Once this is done it’s time to make your petals. Remember the size of your petals will determine the size of your finished magnolia. We wanted to make a statement with a big bloom so the smallest petal we cut was about the size of our hand. Cut six teardrop shaped petals. 16 medium sized heart-shaped petals, eight large teardrop shaped petals and three leaf shaped petals.
3. Now its time to paint the inside of your magnolia (the six small teardrops we cut out earlier in addition to four of our 16 hearts). Starting from the point of each petal paint a soft pink wash over your petals that fades out towards the fuller end. Once dry, dip your brush into a deeper pink or purple and, again working from the tip, brush in an outward direction and leave to dry.
4. Next up is the fun part, well fun for the paper geeks amongst us anyway. Yep, it’s time to mould and shape our petals. Using both hands, pull from the centre of the petal outward. This will create a shallow bowl effect, much like a real life petal. Once done, turn the petal over and curl the tops of your petal around the wooden end of your paint brush. For the heart-shaped petals you will want to curl both curved tops of your heart.
5. It’s time attach your petals, one by one, to the stem, starting with your smaller teardrop shaped petals. Wrap it around the taped floral wire, using more floral tape as you go to secure your petal to the stem. Repeat the process six times, working your way around the floral wire until all of your teardrop shaped petals are used and a nice open bud is formed.
6. Repeat the process with your heart-shaped petals, using the four painted ones first, followed by your larger teardrop shaped petals until they are all used.
7. To finish off your paper magnolia bloom shape the three green petals you cut out earlier and attach them, evenly spaced, with floral tape to the base of your flower, winding the tape all the way down to the base of the stem for additional support.
TOP TIP: Like most fabrics, crepe paper is directional, so make sure the grain that runs through the paper is vertical when you’re cutting your petals or you will not be able to mould and shape them correctly.
CREDITS Photo The Loved Ones.